Debugging Your REST Service From Your Emulator/Device Using SharpProxy
When writing mobile applications, you'll inevitably consume some sort of REST service in your app and more than likely you'll be in charge of writing the REST service yourself. So how do you test your REST service integration on the mobile application while you are still developing it? Your device/emulator does not know how to connect to localhost:portnumber on your PC. You have a couple of things you could do in order to get this working.
Option 1 - Expose IIS Express application to your LAN
You can expose your IIS Express application to your LAN, using your current IP address, by adding a new binding to your IIS Express configuration, as explained in this post.
This is a good option, although it is little bit too manual for my liking. You probably don't want to permanently keep the new binding you created, and every single developer on your team that wants to debug an issue will have to setup the same thing on their development environment.
Option 2 - Emulators
Most emulators (e.g. see Genymotion Network Modes) have some sort of NAT or Bridged connection that you can use to connect to.
I don't particularly like this option. You can only test your REST service from an emulator. The NAT or Bridged connection is emulator specific and doesn't seem to be all that reliable and your IP address can change when updates are made to the emulator software. You can see for yourself in these StackOverflow links:
- Access host from Genymotion emulator.
- How to connect to my localhost web server from Android Emulator in Eclipse
Option 3 - Publish your REST service to a staging environment
This option will allow you to test your REST service from the device, but you cannot step through the code if any issues arise, and you'll have to solely rely on your logs to get debug information. Not great if you are still developing your REST service.
Option 4: SharpProxy
As you can see from the description below SharpProxy is exactly what we need.
SharpProxy is a simple proxy server developed with the intent of being able to open up local ASP.NET development servers.
This allows you to test, hit breakpoints, and generally do development by using other machines and mobile devices.
Simply enter the local port number of your .NET development server and map it with an external port to host on.
In the next part we'll get SharpProxy up and running. This will be a little bit of a manual process, because SharpProxy is really old, and you don't have a lot of places to just download the exe. Optionally I have created a Bitbucket repository with a zip file containing the SharpProxy.exe, that you can download and use.
Initial and final setup for SharpProxy
Let's clone the repository from Github to a folder that you can easily find. We'll just clone it to C:\Tools\SharpProxy.
git clone https://github.com/jocull/SharpProxy.git
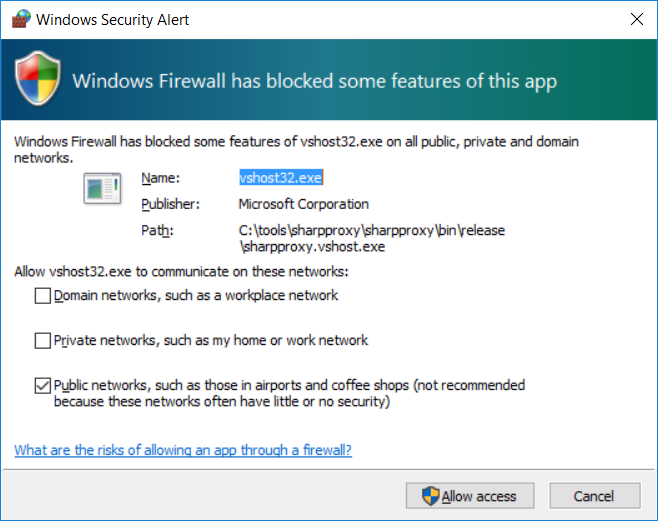
Once the clone is complete, navigate to the directory that you just cloned and open SharpProxy.sln in Visual Studio. Run the application in Release mode. When the application launches, it will prompt you to allow access through your firewall. Choose the option(s) you feel most comfortable with and click on the Allow access button.
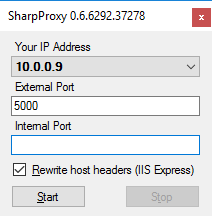
SharpProxy will try and determine your IP address and suggest an external port number for you to expose. In this case my IP address is 10.0.0.9 and it will open up port 5000. You don't have to choose port 5000, you can choose any available port you want.
You can now close the application and close Visual Studio. Open the solution folder in Windows Explorer and navigate to the bin/Release folder. Right-click on SharpProxy.exe and select Send To -> Desktop (create shortcut). You'll now have a shortcut on your desktop that you can easily access whenever you need to.

With SharpProxy now fully setup, we can dive into an example.
Project Setup
In my example project I have the following projects:
Xamarin Android Project
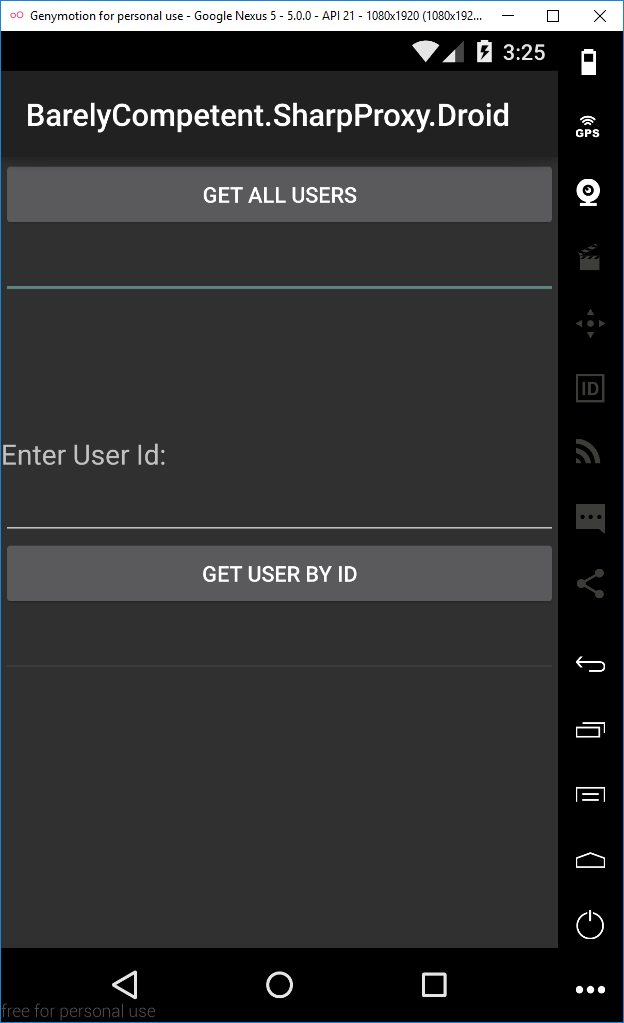
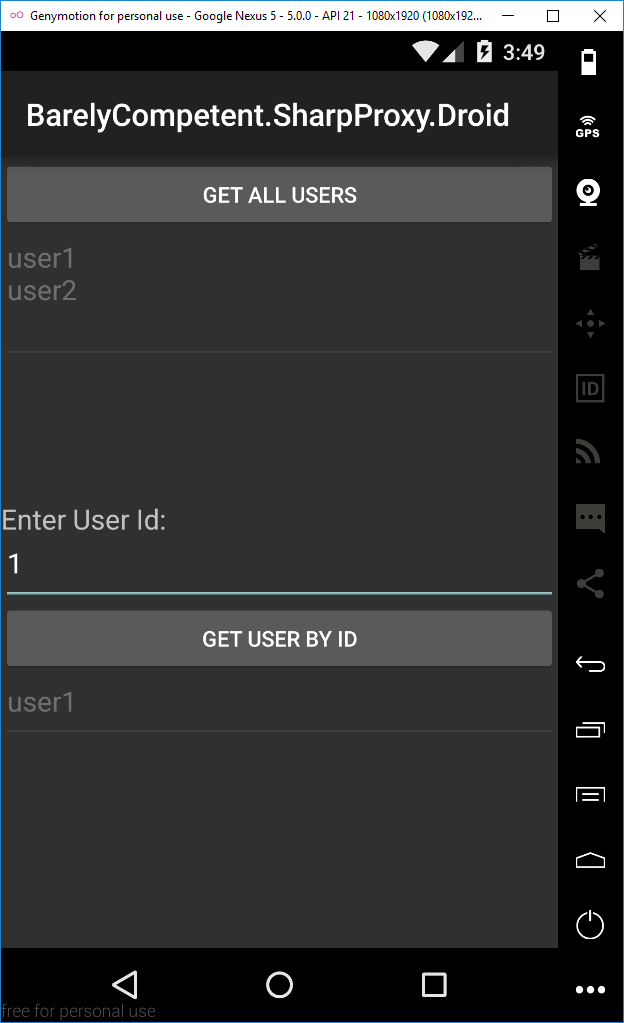
I only have one activity here in the Android project and it looks like this:
The code for the activity:
[Activity(Label = "BarelyCompetent.SharpProxy.Droid", MainLauncher = true, Icon = "@drawable/icon")]
public class MainActivity : Activity
{
    private Button _getAllUsersButton;
    private EditText _getAllUsersResultEditText;
    private EditText _userIdEditText;
    private Button _getUserByIdButton;
    private EditText _getUserByIdResultEditText;
    private UserService _userService;

    protected override void OnCreate(Bundle bundle)
    {
        base.OnCreate(bundle);

        // Set our view from the "main" layout resource
        SetContentView(Resource.Layout.Main);

        InitControls();

        _userService = new UserService();

        _getAllUsersButton.Click += GetAllUsersButton_Click;

        _getUserByIdButton.Click += GetUserByIdButton_Click;
    }

    private void InitControls()
    {
        _getAllUsersButton = FindViewById<Button>(Resource.Id.GetAllUsersButton);
        _getAllUsersResultEditText = FindViewById<EditText>(Resource.Id.GetAllUsersResultEditText);
        _userIdEditText = FindViewById<EditText>(Resource.Id.UserIdEditText);
        _getUserByIdButton = FindViewById<Button>(Resource.Id.GetUserByIdButton);
        _getUserByIdResultEditText = FindViewById<EditText>(Resource.Id.GetUserByIdResultEditText);
    }

    private async void GetAllUsersButton_Click(object sender, EventArgs e)
    {
        var allUsers = await _userService.GetUsers();
        foreach (var user in allUsers)
        {
            _getAllUsersResultEditText.Text += $@"{user}{Environment.NewLine}";
        }
    }

    private async void GetUserByIdButton_Click(object sender, EventArgs e)
    {
        var user = _userService.GetUserNameById(Convert.ToInt32(_userIdEditText.Text));
        _getUserByIdResultEditText.Text = await user;
    }
}
PCL Class Library Project
I have a single class that uses PortableRest to query my REST service.
public class UserService
{
    public RestClient GetRestClient()
    {
        var restClient = new RestClient()
        {
            BaseUrl = "http://localhost:54786/api/" // <-- We'll update this later
        };
        return restClient;
    }

    public async Task<IEnumerable<string>> GetUsers()
    {
        var response = await GetRestClient().SendAsync<IEnumerable<string>>(new RestRequest("users")
        {
            ContentType = ContentTypes.Json,
            Method = HttpMethod.Get
        });
        return response.Content;
    }

    public async Task<string> GetUserNameById(int id)
    {
        var response = await GetRestClient().SendAsync<string>(new RestRequest($"users/{id}")
        {
            ContentType = ContentTypes.Json,
            Method = HttpMethod.Get
        });
        return response.Content;
    }
}
ASP.NET WebAPI Project
Here I am just exposing a single controller with 2 GET methods.
[Route("api/[controller]")]
public class UsersController : Controller
{
    // GET api/users
    [HttpGet]
    public IEnumerable<string> Get()
    {
        return new string[] { "user1", "user2" };
    }

    // GET api/users/5
    [HttpGet("{id}")]
    public string Get(int id)
    {
        return $"user{id}";
    }
}
As you can see there is nothing fancy going on here.
Tying it all together
When I run my WebAPI project it launches it on port 54786, i.e. http://localhost:54786/api/.
We can now copy that port number and paste it into SharpProxy and hit the Start button.
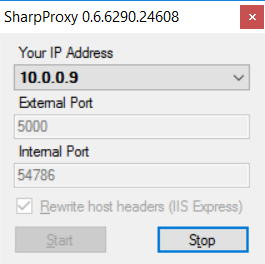
We'll then update our BaseUrl in the UserService to the SharpProxy IP address and port number.
public RestClient GetRestClient()
{
	var restClient = new RestClient()
	{
		BaseUrl = "http://10.0.0.9:5000/api/"
	};
	return restClient;
}
Finally we can test and/or debug our REST service from our device, with breakpoints and everything.
Final Thoughts
Although the example was written in Xamarin and ASP.NET WebAPI, it should work for any service that communicates over HTTP.
With SharpProxy now setup on your development machine, you will be able to test your services from any computer or device in your LAN with ease.
Please let me know your thoughts in the comments section below.